Patching Lynnwood: Why the Same Crack Keeps Coming Back
Karen Petersen called me in October. Not for the first time — I'd actually spoken with her two years earlier, when she'd already had the same living room crack repaired twice by other contractors. "It's back," she said. "Same spot. Wider." She lives in a 1981 ranch on a cul-de-sac in North Lynnwood, the kind of house this city is full of: solid bones, original drywall, three decades of sequential owners who each did something slightly wrong with the walls. By the time I walked in, there were four visible layers of joint compound in that crack, each one a failed attempt to fix something that nobody had actually diagnosed.
The problem wasn't technique. Every contractor who touched that wall knew what they were doing — in modern homes. What they didn't know is that 1981 Lynnwood drywall was finished with setting-type compound (hot mud) that cures chemically rather than by drying. Modern all-purpose compound cures by evaporation. In the Pacific Northwest's humidity cycle — wet falls, dry summers — those two materials move at different rates. Every year, right around October when the rains return and moisture rises, the interface between old and new compound tears. The crack comes back, slightly bigger, every single time.
Lynnwood housing stock: 40%+ built before 1990
Setting-compound era walls that modern patches can't bond to reliablySave $800–$3,000 vs repainting the whole room
Proper patching eliminates flash-through without full repaint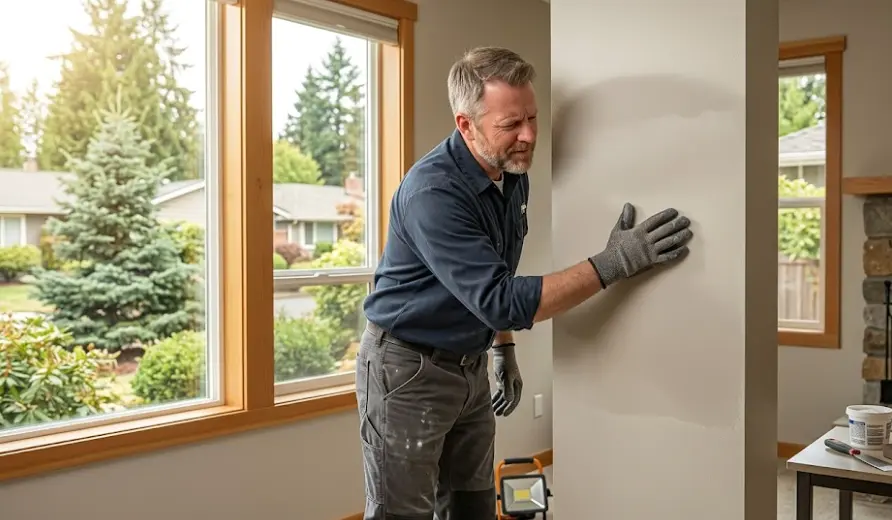
What Lynnwood's Housing Stock Teaches You About Patching
Fifteen years of working in these neighborhoods, one house at a time
The Hot Mud Problem in 1970s–80s Homes
If your Lynnwood home was built before 1990, there's a good chance the original drywall finishing was done with a setting-type compound — what tradespeople call "hot mud." Unlike modern all-purpose joint compound, hot mud doesn't dry. It cures through a chemical reaction, which makes it significantly harder and more rigid than anything you'd buy off the shelf at Home Depot today.
When you apply modern compound over old hot mud, you get two materials bonded together that behave completely differently under humidity stress. The hot mud underneath doesn't move. The modern compound on top does — slightly, but enough. In a climate like Lynnwood's, where relative humidity swings between 55% in August and 85% in November, that differential movement happens twice a year, every year. I've seen patches done by skilled contractors fail within eight months simply because nobody identified what was underneath.
The fix — and I've done this dozens of times in Alderwood and North Lynnwood — is to use a setting-type compound for the base coats over original hot mud, regardless of the patch size. Match the substrate. Only use modern all-purpose compound for the finish skim coat. It's slower, requires more scheduling, but the repair doesn't move.
Texture Matching in the Orange Peel Era
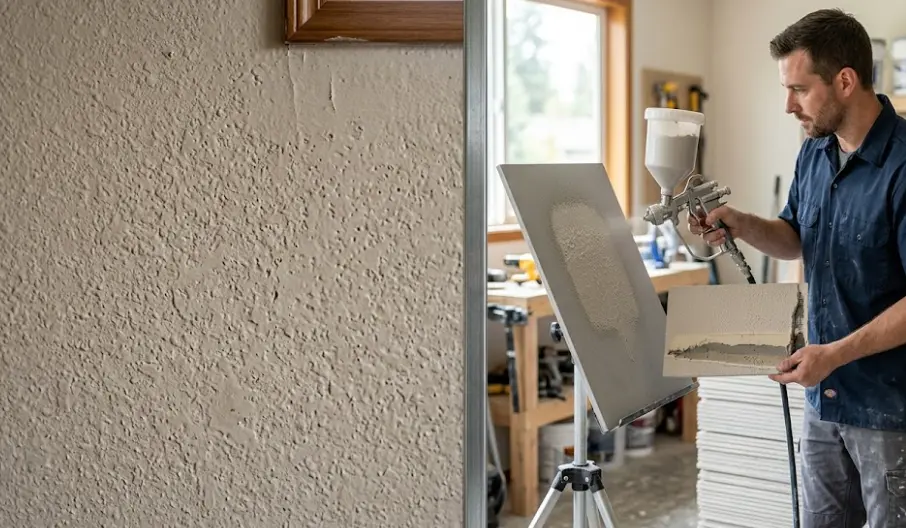
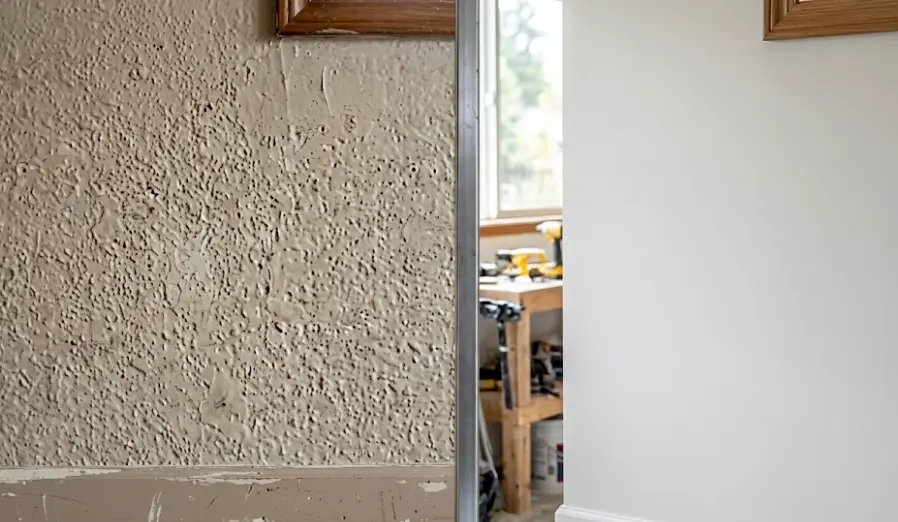
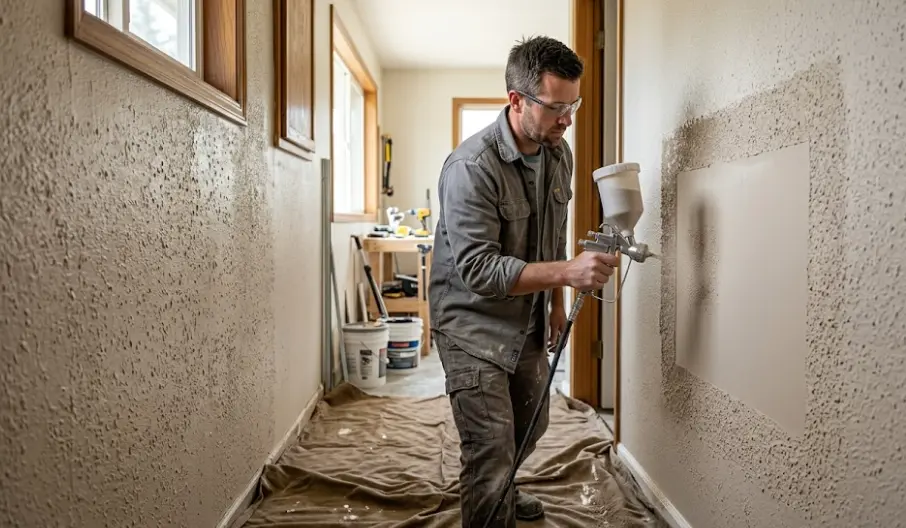
The overwhelming majority of 1975–1995 Lynnwood homes have orange peel texture on their walls. Not popcorn (that was ceilings), not knockdown — specifically orange peel, applied with a hopper gun at the original build. It looks consistent when you stand back, but up close it's actually highly variable: the droplet size changes depending on the spray pressure used that day, the humidity in the garage where the product was mixed, and how long the crew let the texture dry before painting.
Every time I patch an orange peel wall in Lynnwood, I test three or four spray settings on a scrap board before I touch the actual wall. I'm matching a texture that's 30–40 years old and has been painted over four or five times. The layers of paint fill in the peaks slightly, so the pattern is subtler than fresh orange peel. Getting that right means going softer on the hopper pressure than you'd expect, then feathering the edges with a stipple brush on anything larger than a few square inches.
The Martinez family on 196th St SW had a doorknob hole in their hallway that a previous handyman had patched with smooth compound — no texture. The repair had been painted over and was still completely visible because the surrounding wall had that orange peel shadow and the patch was perfectly flat. I spent forty-five minutes on the texture alone. They thought I was being obsessive. After the paint dried, you had to know it was there to find it.
The Rental Turnover Trap
Lynnwood has a significant rental market — I'd estimate a third of the homes I work on in this city are either rentals or were recently converted from rentals. The specific patching challenge in these homes is cumulative damage: nail holes and small repairs stacked on top of each other through multiple tenant cycles, each round covered with a fresh coat of paint rather than properly repaired. I've peeled back layers in some Lynnwood rental units to find six or seven generations of patch compound, each one slightly proud of the surface, each one creating a new bump that the next tenant painted over.
When landlords hire me before a sale or a major refinishing, I don't try to fix each individual issue in isolation. I skim the entire wall surface — a thin, flat coat of setting compound over everything — to bring the plane back to flat. Then texture. Then prime. It takes longer than spot-patching thirty individual holes, but the room reads as a single coherent surface instead of a map of every tenant who ever hung a picture there.
This also applies to sellers. The Thompson family on 56th Ave W was listing their 1988 three-bedroom. Their realtor had told them the walls "needed work" — the kind of diplomatic understatement that means a buyer will walk in and see a wall that looks like it was used for target practice. Two days of prep and skim, one day of texture, one day of prime. Their painter came in and said it was the best surface she'd primed in years. The house sold at asking price in five days.
Why Patches Fail in Lynnwood (And What to Do Instead)
The three patterns I see over and over in Snohomish County homes
Wrong Compound for the Substrate
Modern all-purpose compound is designed for new construction drywall that's never been painted. In homes built before 1990, the substrate behaves completely differently. The old compound is harder, less porous, and doesn't accept new material the same way. Most contractors don't test which generation of compound they're working over — they just apply what's in the bucket.
Result: The repair looks fine for six to twelve months. Then the humidity cycle starts working on the incompatible interface, and the crack reopens. The homeowner calls a new contractor, who does the same thing. By the third repair, the patch is an inch thick in places and the wall looks worse than the original damage.
I identify the substrate first. Old hot mud gets hot mud over it. Modern board gets modern compound. Simple rule, rarely followed.
Rushing the Dry Time
I understand the pressure. Homeowners want their wall fixed today. Landlords need the unit turned over this week. Sellers have a showing on Saturday. But joint compound in Lynnwood's climate — elevated humidity eight months a year — needs real dry time between coats. Not "touch dry." Fully cured, dimensionally stable, ready for the next coat.
I've taken work after contractors who used a heat gun between coats to speed things up. It creates a hard skin over still-wet compound underneath. The repair looks done, paints fine, and then the inner layer finishes drying over the next two weeks — through the wall — and the surface telegraphs cracks as it shrinks. Small ones, but visible, especially under raking light.
My rule: never apply the next coat in under 24 hours in fall or winter. 18 hours minimum in summer with low humidity. It means I can't do a same-day patch-and-paint, but it also means the wall doesn't develop new cracks the week after I leave.
Skipping the Primer Before Paint
This one is cosmetic, but it's the most visible failure mode and the one homeowners notice first. Joint compound is extremely porous — it absorbs paint at a completely different rate than the painted wall surrounding it. If you paint directly over a patched area without priming it first, the paint soaks in faster over the patch, creating a dull spot called "flashing." You can see exactly where the repair was because it photographs differently and catches light differently.
It's especially bad on older Lynnwood homes where the existing walls have four or five coats of paint that have built up a non-porous surface over decades. The contrast between old wall and fresh compound is extreme. Even one coat of drywall primer seals the compound and equalizes absorption before the topcoat goes on.
I prime every patch. It takes twenty minutes and eliminates the most common complaint I hear from homeowners whose previous repairs are still visible after painting.
Lynnwood Neighborhoods: What the Houses Actually Look Like
Specific knowledge from years of working street by street
Lynnwood's Largest Housing Cluster
The Alderwood area around the mall has the densest concentration of 1970s–1985 ranches and split-levels I work on anywhere in Snohomish County. These homes were built quickly during a suburban expansion period, and while the construction quality is generally solid, the drywall finishing was done at volume — meaning variable compound thickness, inconsistent joint taping, and a lot of butt joints that were never properly feathered out.
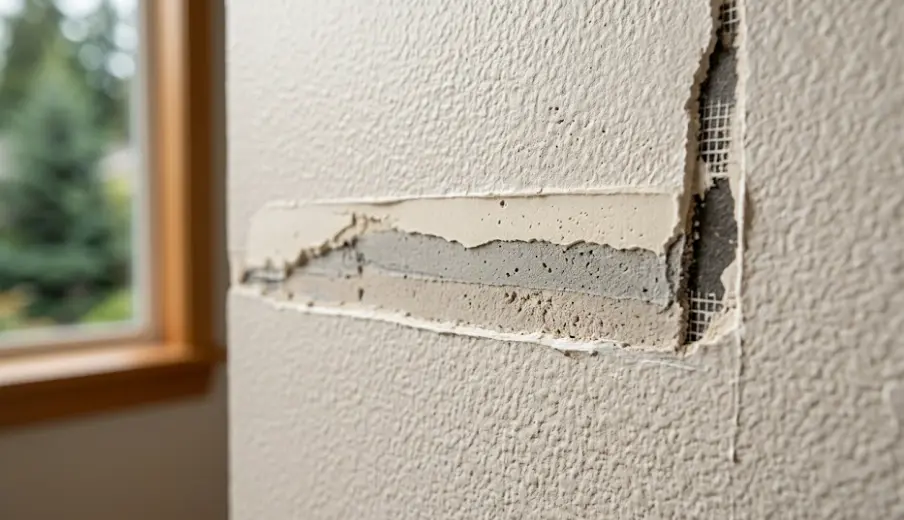
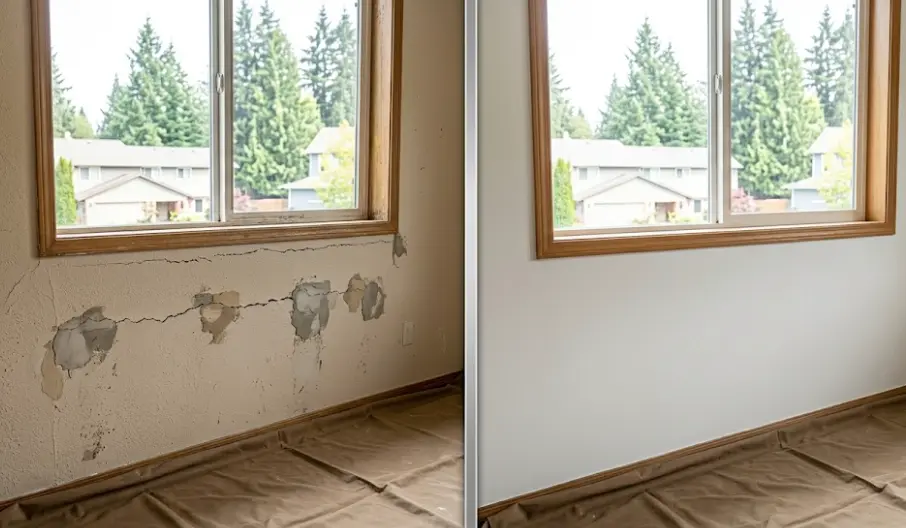
The specific failure I see most in Alderwood: horizontal cracks along the bottom of windows, caused by slight foundation movement that's happened gradually over forty-plus years. These cracks are structural stress indicators, not random damage. Patching them without addressing the underlying movement pattern just defers the problem. I use a fiberglass mesh tape and flexible setting compound at these locations, which accommodates small ongoing movement rather than fighting it.
The Anderson family on 196th St SW — their home had this exact pattern in every exterior-wall room. Four horizontal cracks, each previously patched. I explained the cause, used the flexible system, and haven't heard from them in two years. That's the outcome I'm after.
The Water Damage Neighborhood
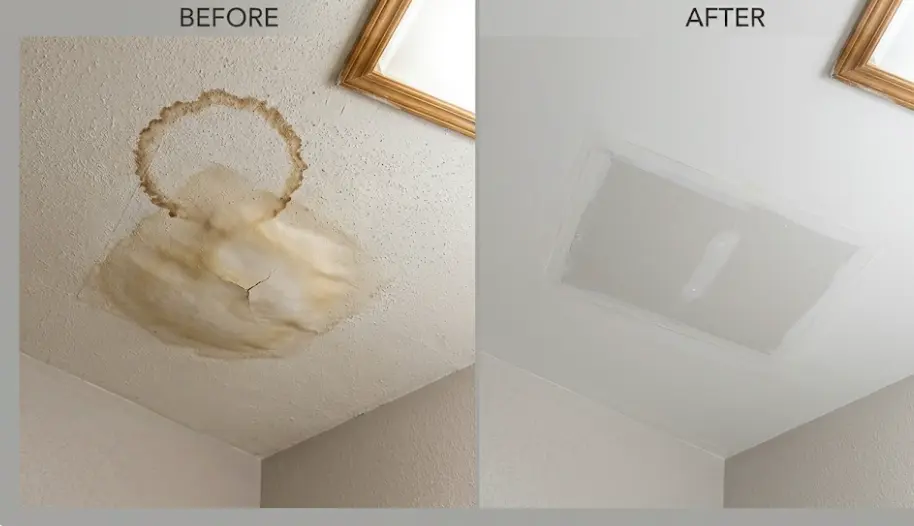
The Scriber Lake area sits in a slight topographic bowl, and the homes here deal with drainage and moisture issues that other parts of Lynnwood don't. I've done more water-damage patching in this neighborhood than anywhere else in the city. The pattern is predictable: a slow roof leak or plumbing seep goes undetected for months, softens the paper face of the drywall, and by the time the homeowner notices, there's a soft spot or stain that needs more than compound to fix.
Water-damaged drywall can't just be patched — the paper backing is compromised and won't hold compound reliably. The affected section needs to be cut out and replaced before any finishing work begins. I bring a moisture meter to every job in this part of Lynnwood. If the reading is above 12%, we're replacing drywall, not patching. This surprises some homeowners who expected a cosmetic repair, but I'd rather explain that once than have them call me back in six months with a fresh stain over a patch that failed because the substrate was still wet.
Newer Homes, Different Problems
North Lynnwood and the Picnic Point corridor include more 1990s–2005 construction than the older Alderwood stock. These homes used modern gypsum board with modern compound, so the substrate-compatibility issue is less common. But they have their own specific patching challenge: the builder-grade finish quality on these homes was often rushed, and the joints were skimmed thinly. Over twenty years, those thin-skimmed joints telegraph through paint as subtle ridges or slight concave shadows.
When homeowners in this area want to repaint, they often notice for the first time that their walls have visible joint lines. It's not new damage — it's been there since the house was built. Fixing it properly means skim-coating the entire wall surface, not patching individual joints. The Chen family on Harbour Reach Rd came to me for what they described as "a few cracks." They ended up skimming three rooms. The result looks like a new custom home rather than a twenty-year-old builder spec.
Pre-Sale Preparation Zone
The South Lynnwood area, which borders Mountlake Terrace and Shoreline, has a high concentration of homes being prepped for sale as longtime owners downsize. These are typically 1960s–1975 builds, smaller square footage, and they often haven't had significant interior work in fifteen to twenty years. The walls accumulate a history: furniture scuffs, nail holes from multiple generations of décor, cracks at door corners from years of heavy use.
I work with several Lynnwood realtors who recommend me specifically for pre-sale preparation in this neighborhood. The goal is always the same: get the walls to a condition where a buyer's eye moves through the room without stopping on anything. Not magazine-perfect — that would look incongruous with the rest of the home. Just neutral and clean. I've done this enough times to know which repairs are invisible and which ones call attention to themselves.
How a Lynnwood Patching Job Actually Works
Start to finish — no shortcuts, no surprises
Substrate Identification Before Anything Else
I knock on the wall, probe the damage with a putty knife, and in older homes I'll pull a small sample from inside the damaged area to check the compound type. If there's any question about moisture involvement, the meter comes out before any other tool. This takes fifteen to twenty minutes and determines everything that follows — compound selection, whether I'm patching or replacing drywall, and whether I need to have a conversation about a deeper problem before the cosmetic work starts.
I've walked away from jobs when the substrate wasn't right for patching — not because I couldn't do it, but because I knew it would fail. The homeowner deserves to know that before I take their money.
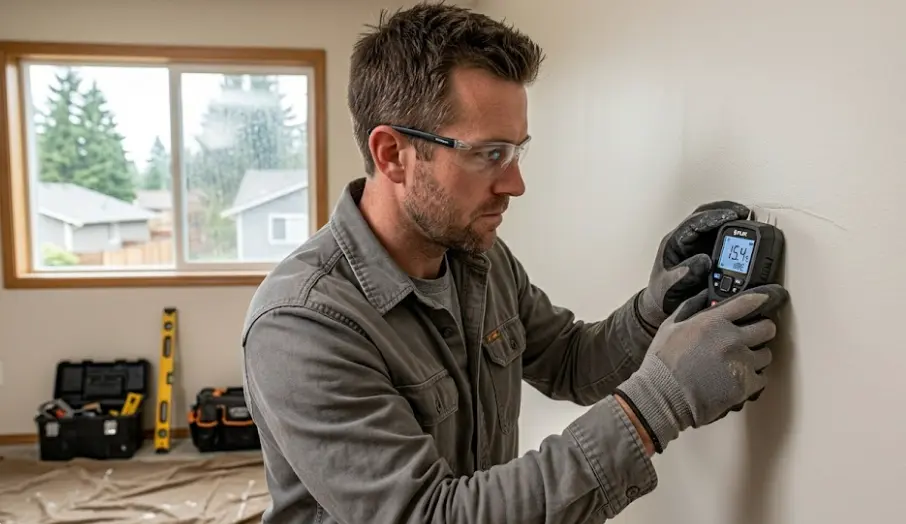
Moisture readings above 12% mean the drywall needs replacement, not patching. I find this in about one in five Scriber Lake area jobs. Better to know before the repair than after.
Preparation: The Step That Determines Everything
Clean edges. Remove all loose compound, tape, or paper. For cracks, I open them slightly with a utility knife — a wider, clean-edged kerf bonds better than a hairline crack filled under pressure. For holes, I cut to clean boundaries and install backing where needed. For water-damaged areas, I cut well past the visible stain because wet compound extends further than the water mark suggests.
This preparation takes longer than the actual patching on smaller jobs. It's unglamorous work that nobody photographs, but the finished result is entirely determined by how clean the substrate is when the compound goes on.
Compound Selection and Application
Pre-1990 substrate: setting compound for base coats, matched to the original material. Modern substrate: all-purpose for everything. Structural locations (door corners, window bottoms in settling homes): fiber-reinforced mesh tape and flexible setting compound. Water-damaged replacement areas: new drywall taped with paper tape and setting compound — no mesh at joints, which can telegraph over time.
Three coats minimum, 24 hours between each in fall and winter. The first coat fills. The second coat shapes and extends the feather. The third coat is the finish — thin, barely there, just enough to get the surface flat under a hand check and a raking light check.
Texture Matching
Orange peel on 1970s–80s homes gets a hopper gun, tested on cardboard first, adjusted until the droplet size and distribution matches the existing pattern at a viewing distance of four feet. I take my time here. Knockdown gets a trowel and a specific timing — apply, wait, flatten. The wait time is everything; too early and the pattern disappears, too late and the trowel drags. Smooth walls get a skim coat and a light sand.
I've done this enough times in Lynnwood specifically that I can usually match the texture on first or second try. The Lynnwood 1975–1985 orange peel is a specific pattern I know well.
Prime, Inspect, Prime Again if Needed
Drywall primer seals the compound and equalizes the absorption difference between patched and painted areas. One coat, let it dry, check it under raking light. If I can still see the repair boundary, I spot-prime again. Only when the surface reads as uniform under direct and raking light do I consider the job ready for paint.
Most homeowners have their own painter or want to paint themselves. I leave the wall primed and flat, ready for any topcoat. When I'm also doing the paint, I do a full wall prime before topcoat — not just the patches — so the sheen is consistent throughout the room.
Four Lynnwood Walls, Four Different Problems
Real jobs, specific outcomes
The Crack That Came Back Every October
Location: North Lynnwood (1981 ranch) • Cost: $340
Karen Petersen's living room crack had been repaired by three different contractors over four years, always with modern all-purpose compound over the original 1981 hot mud. Every fall it reopened. I stripped back to the substrate, identified the compound type, and rebuilt the repair using setting compound throughout with a fiberglass mesh tape for the flexible junction. Two years of Lynnwood winters since — no movement.
"I'd resigned myself to repainting this room every two years. After Antonio explained what was actually happening, and fixed it properly, I realized I'd been paying to have it done wrong three times running." — Karen Petersen, North Lynnwood
The Doorknob Hole Before the Open House
Location: Alderwood (1979 split-level) • Cost: $195
A doorknob impact hole in the hallway, about three inches in diameter. The orange peel texture on this 1979 home was the specific issue — a previous owner had touched up a different wall area with a different spray pattern, so I had to match the original texture from the untouched sections, not the adjacent patch. Backing installed, three-coat build, hopper gun calibrated to the original pattern. The listing photos didn't show a hint of it.
The buyer's inspector didn't mention it. Neither did any of the twelve people who walked through the open house.
The Stain That Wasn't Just a Stain
Location: Scriber Lake (1984 rambler) • Cost: $520
James Ortega called about a water stain in the bathroom ceiling. My moisture meter read 18% — well above the 12% threshold for compound stability. The stain was a slow shower exhaust leak that had been wicking into the drywall for at least a year. I explained that patching over wet drywall would fail within months, and outlined what replacement involved. He had a plumber fix the vent seal first, we let the area dry for a week, then replaced the section and finished it. The ceiling looks original.
"He saved me from paying for a repair that would have failed. I appreciated that he told me the truth instead of just taking the easier job." — James Ortega, Scriber Lake

Three Rooms of Rental History
Location: South Lynnwood (1988 rental) • Cost: $1,100
The Thompson family's rental had been occupied continuously for eleven years with no interior work. Three bedrooms and a hallway with generations of nail holes, drywall anchors, scuffs, and one ceiling patch that had been painted over without priming and flashed terribly. Spot patching thirty-plus individual issues would have taken longer and looked worse than skim-coating the entire surface. Two days of prep and skim, one day of texture, one day of prime. The painter who came after called it the cleanest surface she'd worked on in months.
The house sold at asking price in five days. The listing agent credited the interior condition as a meaningful factor in attracting a quick offer.
What Patching Costs in Lynnwood
Flat pricing by damage type — no surprises
Nail & Screw Holes
- ✓ Up to 10 holes per visit
- ✓ Compound, prime, texture
- ✓ Ready for paint same week
- ✓ Free site assessment
Crack Repair
- ✓ Root cause assessment
- ✓ Substrate-matched compound
- ✓ Flexible system for settling cracks
- ✓ 3-year repair warranty
Hole Repair
- ✓ Backing installation included
- ✓ 3-coat finish system
- ✓ Orange peel texture matching
- ✓ Primed and ready to paint
Full Wall Skim
- ✓ Full surface skim coat
- ✓ All damage addressed
- ✓ Re-texture if needed
- ✓ Prime coat included
Water Damage: Assess Before Pricing
Water-damaged areas require a moisture meter reading before I can give a number. If the drywall is still wet, the scope changes. I don't price water damage jobs over the phone — I need to look at the wall first. Assessment is free, and I'll tell you exactly what the repair involves before you decide.
What Lynnwood Homeowners Say
Results that hold through Pacific Northwest winters
"I'd had the same crack fixed three times. Three different contractors, same result — it always came back in the fall. Antonio explained why it was happening, and what would actually fix it. That was two years ago. Two wet Lynnwood winters and the repair hasn't moved. I wish I'd called him first."
— Karen Petersen
North Lynnwood • 1981 ranch • $340"He told me I had wet drywall before he touched anything. I didn't know that was a thing. Turned out there'd been a slow leak for over a year. He wouldn't patch it until the plumber fixed the source, which I appreciated — he could have just taken the money and left me with a repair that failed in six months. Honest work. That's rare."
— James Ortega
Scriber Lake • Water damage repair • $520"Our 1979 hallway had orange peel texture that we thought was impossible to match — we'd been told by two people to just repaint the entire room after the hole repair. Antonio matched the texture so well I had to ask him to point out where the patch was. I could not find it on my own. The painter who came after actually called to ask who'd done the prep."
— Rachel and Kevin Marsh
Alderwood • Doorknob hole repair • $195"We used Antonio to prep three rooms in our rental before listing. He recommended skimming the whole surface instead of patching individual spots, which I initially pushed back on for cost reasons. He explained why — that thirty individual repairs would look like thirty individual repairs. He was right. The house sold in five days at asking. Our realtor said the interior was a meaningful part of the buyer's decision."
— Linda Thompson
South Lynnwood • Pre-sale skim coat • $1,100What I Stand Behind
Specific guarantees on every job
3-Year Repair Warranty
If any repair I do fails — cracks, separates, or shows through paint — within three years, I come back and fix it. No charge.
Honest Assessment
If your wall needs drywall replacement rather than patching, I'll tell you that before taking any money. No partial fixes that fail in six months.
Raking Light Inspection
Every repair is inspected under raking light — the harshest test for surface flatness — before I consider it finished. Not just overhead light.
Licensed & Insured
Washington State licensed contractor, fully insured. Written estimate on every job. No cash-only or verbal agreements.
More Lynnwood and Snohomish County Services
Complete interior solutions for your home
Interior Painting Lynnwood
Professional interior painting in Lynnwood — patch prep and paint in one project.
House Painting Lynnwood
Full interior and exterior house painting in Lynnwood from one crew.
Nearby Patching
Also serving Shoreline, Bothell, and Mill Creek.
Wall Painting Lynnwood
Full wall painting service in Lynnwood after patching is complete.
Ready to Fix It the Right Way?
If a crack has come back more than once, or a previous patch is still visible, the repair wasn't done to your wall's specific requirements. I'll come out, assess the substrate, and tell you honestly what the right fix looks like — before any work starts. Lynnwood homes have specific needs that generic patching doesn't meet. Fifteen years of working in this city means I know exactly what yours needs.
Serving All Lynnwood Neighborhoods
Alderwood, Scriber Lake, Picnic Point, North & South LynnwoodFree On-Site Assessment
Moisture meter included — no surprises after the job startsOr call directly: