Patching Renton: The DIY Disaster Recovery Specialist
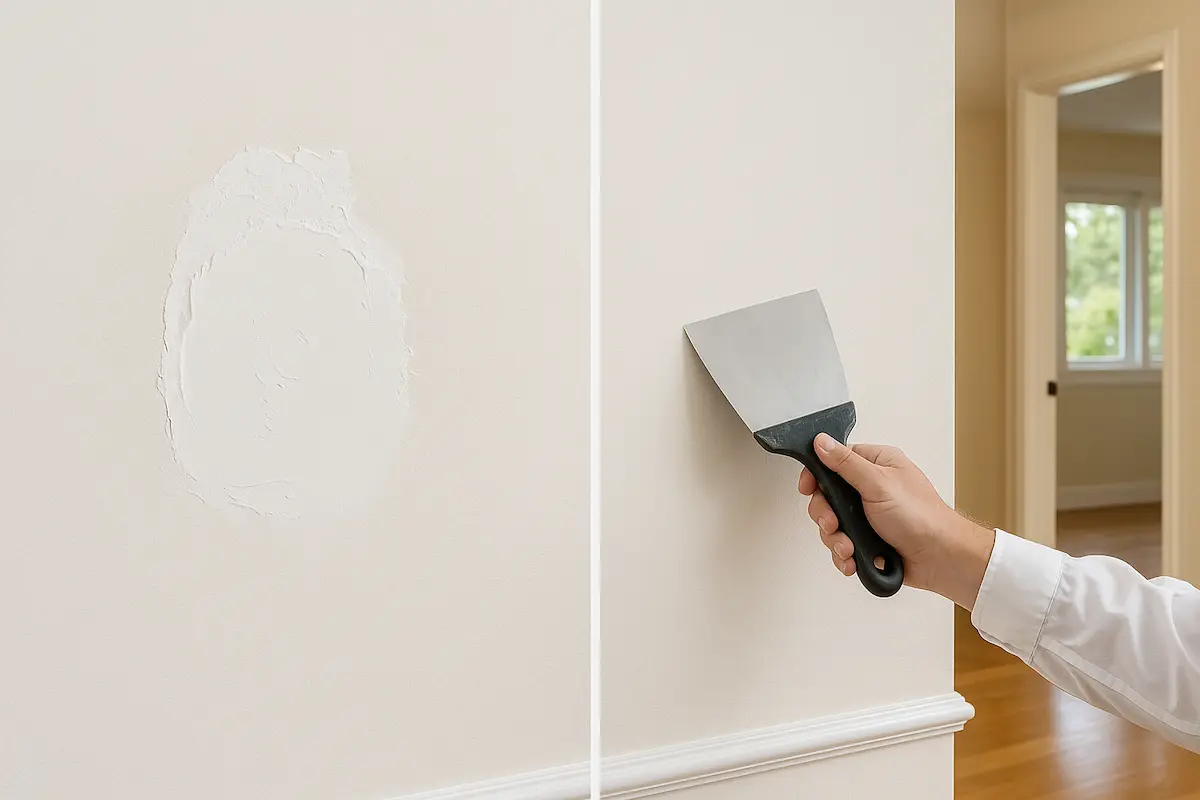
Saturday afternoon. Mike Chen stands in his Kennydale living room, surveying the crater-sized hole his son's basketball created last week. "How hard can drywall patching be?" he asks, watching a confident YouTuber make it look trivial. Four hours, three Home Depot trips, and $87 in materials later, Mike stares at what can only be described as a lumpy, off-color crime scene on his wall.
Monday morning. Mike calls me. "Can you fix this? My wife is... not happy." I arrive to find textbook DIY disaster: wrong compound, visible edges, texture nowhere close to matching, paint color off by two shades. The patch screams "AMATEUR WORK HERE" from across the room.
Mike paid 7x more because YouTube made it look easy.
Why Patching Looks Simple But Rarely Is
The five reasons your patch will probably be visible forever
You Bought the Wrong Compound
Home Depot sells seventeen different drywall compounds. Customers grab whatever's cheapest or has the coolest bucket. Sarah Martinez bought "Fast-Set" because faster sounds better. It dried before she could smooth it, cracked within days, and created edges harder than concrete that wouldn't sand.
The compound you need depends on hole size, location, existing wall condition, texture type, and whether you're painting same-day or next week. Get this wrong and nothing else matters.
Reality: I carry six different compounds and choose based on specific conditions. The "all-purpose" joint compound rarely serves any purpose well.
Texture Matching Is Actually Impossible
YouTube guy sprays some texture, it looks perfect, everyone claps. What they don't show: He's matching brand-new drywall to brand-new texture. You're matching 1987 knock-down texture that's been painted twelve times, compressed by 35 years of settling, and has a specific pattern that contractor created with tools that don't exist anymore.
The Williams family spent $240 on texture supplies trying to match their Bothell-style ceiling. After four attempts, they had four different textures, none matching the original.
What Texture Matching Actually Requires:
- 15+ years experience with regional texture styles
- Understanding of how texture aged and compressed
- Custom tool techniques for period-specific patterns
- Ability to read paint layers like tree rings
The Patch Edges Give You Away
Professional patching means "invisible" patching. The edge transition from patch to existing wall determines whether someone sees your repair from three feet or thirty feet. DIYers create edges like geological formations—visible, dramatic, inexcusable.
David Park patched his Highlands home perfectly flat. Still obvious. The edges weren't feathered properly, creating a subtle but unmistakable boundary that caught light at every angle.
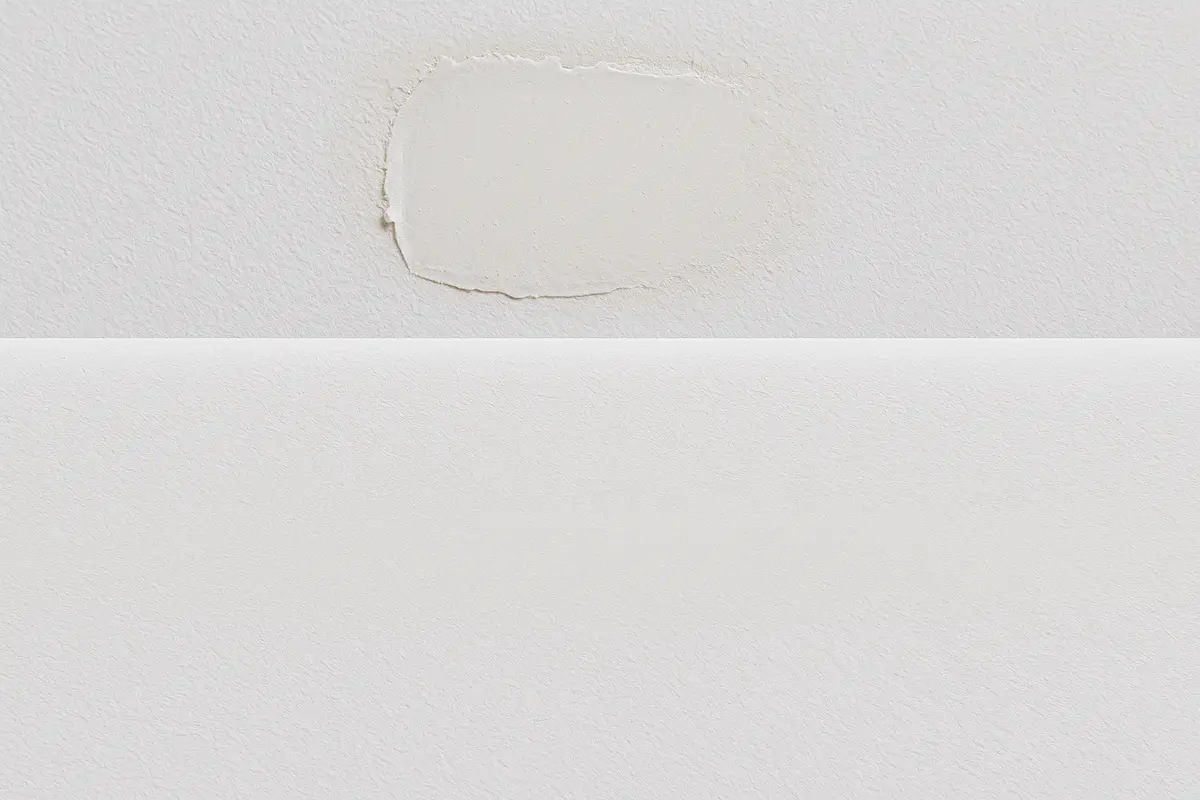
Professional edge feathering extends 18-24 inches beyond the patch, creating transitions so gradual the eye can't detect them. This takes specific trowel techniques developed over years.
Paint Matching Never Works
"Just color-match at the store," everyone says. Jennifer Torres took a paint chip to Home Depot. Computer matched it perfectly. She applied it. Completely wrong. Why? Her wall paint was 11 years old, faded by sun, yellowed by time, affected by smoke and cooking oils. The "match" looked like a spotlight highlighting her patch.
Even with perfect color matching, paint sheen differences reveal patches. Fresh paint over fresh compound reflects light differently than aged paint over aged drywall. It's physics, not skill.
The Truth: Perfect invisible patching usually requires repainting the entire wall. This is why professional room painting often includes patching—we're painting everything anyway.
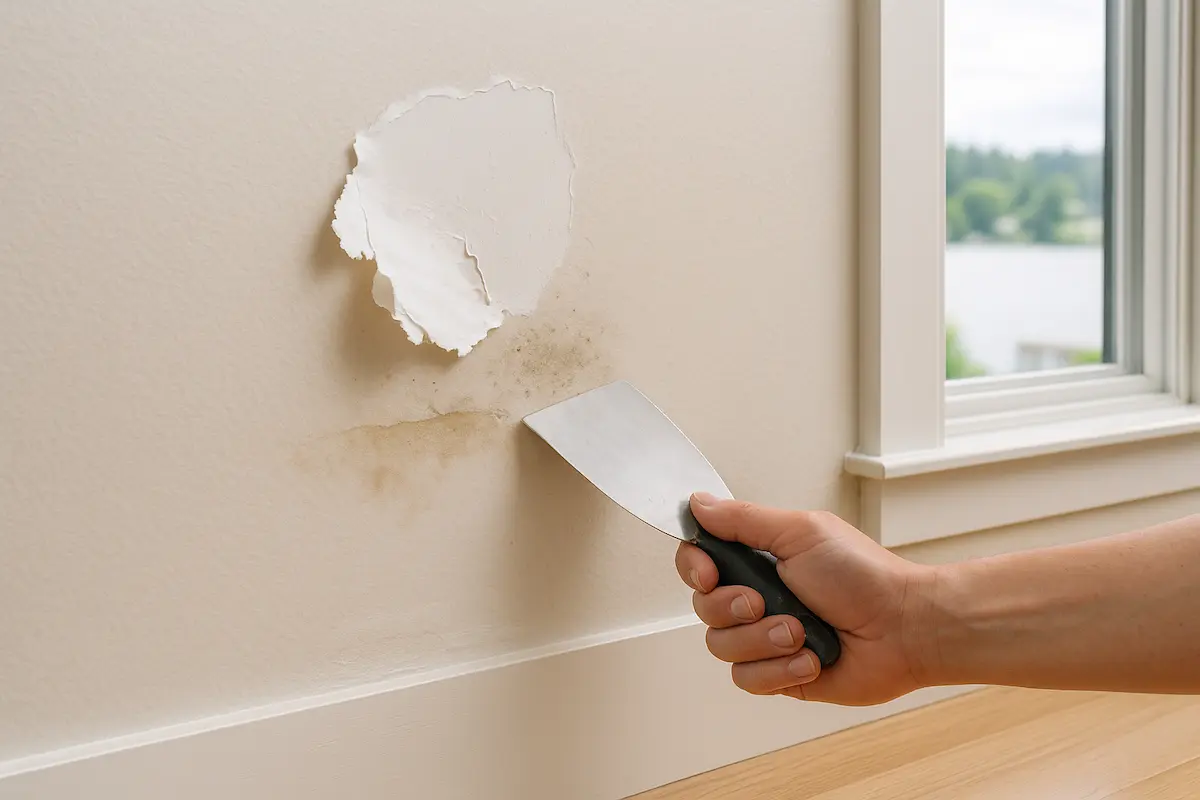
You Can't See Your Mistakes Until It's Too Late
Here's the cruel reality: Compound looks perfect when wet. Texture looks great when wet. Paint looks matched when wet. Everything dries. Colors shift. Textures compress. Edges become visible. What looked flawless Saturday evening looks terrible Sunday morning.
By then, the compound is hard, the texture is set, the paint is dry. Fixing it means removing everything and starting over—now with a bigger patch, more work, and damaged surrounding areas.
The Rodriguez family learned this watching their "perfect" ceiling patch develop a spiderweb of cracks over three days as improper compound dried. They'd already removed the scaffolding, put furniture back, and invited relatives over to admire their work.
Why Patching in Renton Specifically Defeats DIYers
Our older housing stock creates unique challenges
1950s-1970s Construction Dominance
Renton's housing boom happened when drywall installation was transitioning. Many homes have plaster over lath, early drywall with different backing, or hybrid systems that require specialized knowledge.
Last month, the Johnsons tried patching their 1963 Highlands home. They discovered horsehair plaster behind a thin drywall veneer—a common Renton construction method. Standard drywall patching techniques don't work. Their $40 patch became $680 professional restoration.
Common Renton Wall Systems:
- Plaster over wood lath (pre-1950s)
- Rock lath with plaster coating (1950s)
- Early drywall (1960s-1970s, different from modern)
- Hybrid plaster/drywall combinations
Lake Washington Moisture Issues
Properties near the lake or in lower-lying areas face constant moisture infiltration. This affects patch adhesion, compound drying time, and long-term durability in ways YouTube tutorials never mention.
I've seen beautiful patches fail within months because DIYers used standard compound in humid conditions. Professional moisture-resistant formulations cost 40% more but last 15+ years versus 6-18 months.
Kennydale, Sunset, Riverview: These lakefront neighborhoods need specialized patching materials that address persistent moisture. Standard Home Depot compounds fail predictably.
Boeing-Era Texture Styles
When Boeing was building up in the 1960s-1980s, Renton construction followed specific texture trends. Knock-down, orange peel, skip-trowel patterns from that era used techniques and tools that are different from modern applications.
The Chen family spent weeks trying to match their 1978 orange peel ceiling texture. Modern spray patterns look completely different. I had to use a vintage technique with a specific roller nap that hasn't been manufactured in 20 years. I keep these tools specifically for Renton's older homes.
The Landing & Newer Construction
Renton's newer developments use modern drywall but often have quality control issues contractors left behind. Patches in these areas reveal poor initial tape jobs, improper fastening, or structural movement that needs addressing before patching works long-term.
In The Landing condos, I regularly find patches failing not because of poor patching technique but because the original drywall installation was substandard. Professional assessment prevents repeat failures.
Anatomy of a Professional Patch
What actually happens when someone knows what they're doing
I Don't Start With Compound
First 10 minutes: I examine the damage, but more importantly, I examine everything around it. Why did this hole happen? Is there structural damage? Water damage? Settling? A doorknob that will create another hole unless I fix the underlying cause?
Last week, someone called about a fist-sized hole in their Highlands home. Investigation revealed foundation settling causing wall flex. Patching without addressing this would fail within months. We stabilized the structure first, then patched. That hole cost $320 to fix properly versus the $80 they expected.
Compound Choice Determines Everything
I select compound based on:
- Hole size: Small holes need lightweight spackle, large holes need hot mud
- Location: Ceiling patches need different compound than walls
- Moisture conditions: Bathrooms and basements need moisture-resistant formulations
- Texture type: Some textures require specific compound bases
- Timeframe: Same-day patches need fast-set, but it's harder to work with
For the Martinez family's bathroom patch, I used mold-resistant compound with extended working time because their ventilation is poor. Standard compound would have failed from moisture within a year.
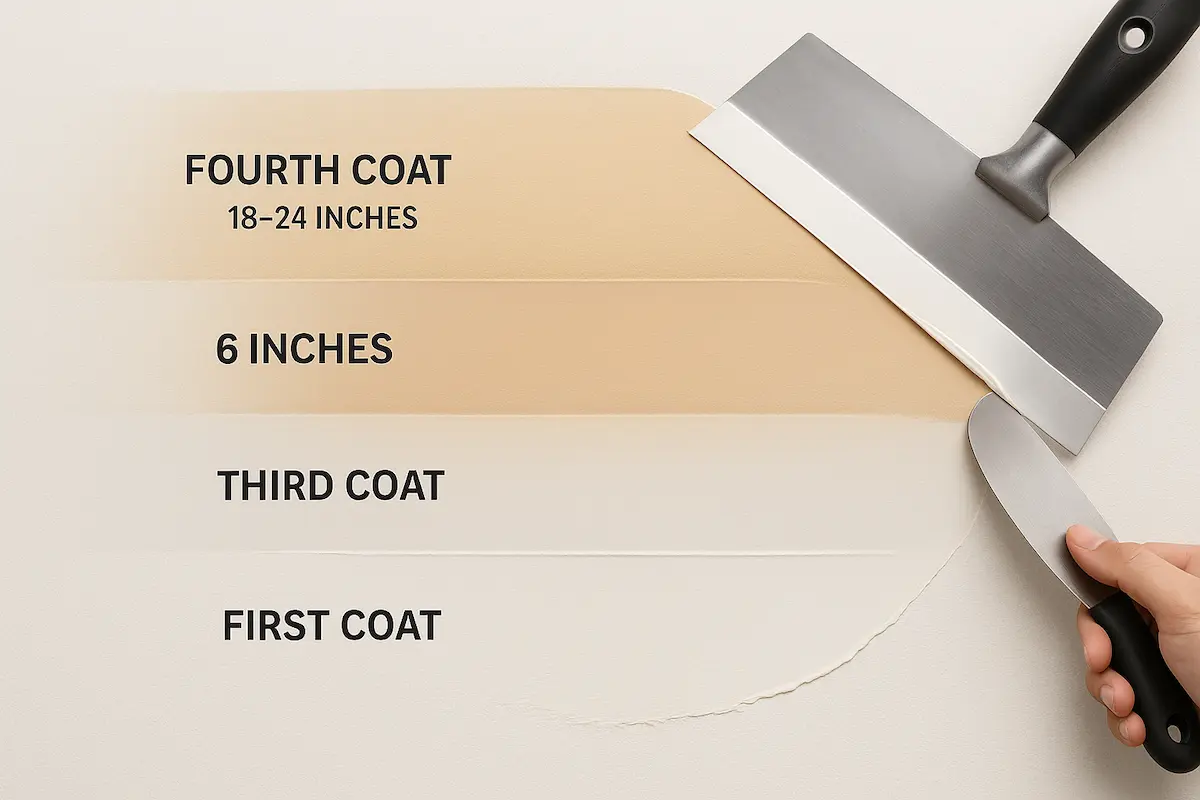
The Invisible Transition
This is where DIYers fail and professionals earn their fee. I apply compound in progressively thinner layers extending 18-24 inches beyond the patch. Each pass with the trowel gets wider and lighter until the transition is imperceptible.
Professional Feathering:
- First coat: Fill the depression
- Second coat: 6 inches beyond patch
- Third coat: 12 inches beyond
- Fourth coat: 18-24 inches, paper-thin edges
- Sand between coats progressively finer
The Part That Takes 10 Years to Learn
I analyze your existing texture under different lighting, at different angles, from different distances. Then I match the pattern, the depth, the distribution, and the aging characteristics.
For knock-down texture, I need to know: What was the original spray pattern? How deep? How was it knocked down—with a trowel or knife? What direction? How hard? How long after spraying? These variables create thousands of possible textures. Getting it wrong is obvious. Getting it right is invisible.
My Secret: I practice on scrap drywall before touching your wall. I get texture perfect on test pieces, then replicate exactly on your patch. DIYers practice on their walls and hope for the best.
Why I Usually Recommend Full Wall Repainting
Perfect patch, perfect texture, perfect edges—still visible if paint doesn't match. Fresh paint over fresh compound reflects light differently than aged paint over aged drywall. This is physics, not incompetence.
I can feather paint to minimize this, but honestly? If you want invisible, repaint the whole wall. It's usually only $200-300 more and guarantees the patch disappears completely. Many clients choose full room painting when they see the value.
Why Texture Matching Is Actually Impossible (For You)
The skill that separates $80 patches from $800 disasters
The Texture Reality Check
Your home's wall texture wasn't created by a machine following precise specifications. It was created by a contractor having a good or bad day, using specific tools and techniques that may not exist anymore, working at a specific temperature and humidity, with materials formulated differently than today's products.
That texture then aged for 30-50 years. Settled. Compressed. Absorbed cooking oils, cigarette smoke, fireplace soot. Got painted multiple times, each coat filling valleys and rounding peaks. The texture you see today isn't what was created—it's an evolved version that's impossible to replicate exactly.
What DIYers Create
• Too thick or too thin
• Wrong pattern entirely
• Looks fresh and obvious
• Visible from across room
• Gets worse as it dries
• Paint makes it more visible
What Professionals Achieve
• Perfect depth matching
• Aged appearance integrated
• Invisible at 3 feet
• Passes "wife test"
• Improves after painting
• Guests never notice
Renton's Most Common Textures (And Why They're Nightmares):
Knock-Down (1970s-1990s): Spray applied, then knocked down with trowel. The timing, pressure, and direction create infinite variations. I've seen five different knock-down styles just on Sunset Avenue.
Orange Peel (1960s-present): Spray texture that looks simple but requires specific equipment and technique. Modern hopper guns create different patterns than vintage equipment used in Renton's older homes.
Skip-Trowel (1950s-1970s): Hand-applied with trowel in specific patterns. Each contractor had their own style. Matching requires understanding which direction they worked and how heavy their hand was.
Smooth/Skim Coat (High-End Homes): Looks flat but actually has subtle textures from trowel marks. Matching requires perfect material consistency and trowel technique that takes years to develop.
What Professional Patching Actually Costs in Renton
No games, no surprises, just honest pricing
Small Patches
Includes:
- Holes up to 4 inches
- Professional compound
- Texture matching
- Edge feathering
- Primer application
- Touch-up paint if color matches
Medium Repairs
Includes:
- Holes 4-12 inches
- Multiple small patches
- Backing installation if needed
- Professional texture matching
- Extended feathering
- Full wall assessment
- Recommendations for paint
Large/Complex Repairs
Includes:
- Holes over 12 inches
- Plaster repair (older homes)
- Structural assessment
- Moisture investigation
- Complex texture matching
- Multiple coats and visits
- Often includes wall repainting
What Affects Patching Cost:
- Hole Size: Bigger = more materials, time, backing required
- Location: Ceilings cost more (scaffolding, difficulty)
- Texture Complexity: Knock-down harder than orange peel
- Wall Type: Plaster costs more than drywall
- Moisture Issues: Addressing cause adds cost
- Structural Problems: Fixing movement before patching
- Paint Matching: Full wall repainting recommended
- Access: Furniture moving, ladder work
My Promise: I assess damage in person, explain exactly what's needed, and provide fixed-price quotes. No surprises, no upselling, no hidden fees. If I find additional issues, I discuss them before doing anything extra.
When to Stop Watching YouTube and Call Someone
Six signs your patch needs professional help
Water Damage
If moisture caused the damage, patching won't work until the source is fixed. I find and address causes DIYers miss.
Older Homes (Pre-1980)
Plaster, lath, hybrid systems require specialized knowledge. Standard drywall techniques fail on these materials.
Large Holes (Over 4")
Require backing, support, and multi-stage repair. DIY mesh patches work on small holes only.
Complex Textures
Knock-down, skip-trowel, aged textures are impossible to match without experience and proper tools.
Visible Locations
Living room, entryway, anywhere guests see. These demand invisible repairs DIYers can't achieve.
Selling Your Home
Buyers notice bad patches. Professional repairs add value, DIY patches cost you thousands in negotiations.
Stop the DIY Bleeding. Get It Done Right.
I've fixed hundreds of botched DIY patches in Renton. Every single homeowner says the same thing: "I should have just called you first." Learn from their expensive lessons.
15+ Years Renton Experience
I know your neighborhood's constructionInvisible Repairs
Your guests won't know we were thereOr call immediately:
(425) 287-3619
Free quotes, honest pricing, zero pressureComplete Painting & Repair Services in Renton
Professional solutions for every need
Drywall Repair
Complete drywall repair and painting services.
Interior Painting
Professional interior painting including patching.
Kitchen Cabinets
Expert cabinet painting and refinishing.